Mar 3, 2019
Patching and Darning Kid's Knees
If you've got a small and active child, you're sure to have noticed a few pairs of pants getting ragged around the knee caps. A busy parent with more money than time might just toss the damaged article in the garbage and not think twice about it, but those of us who choose to be more frugal and concerned with the environment might be driven to patch the knees and extend the wear of these clothes even if only for a couple of months.
Option A: Store-Bought Patches
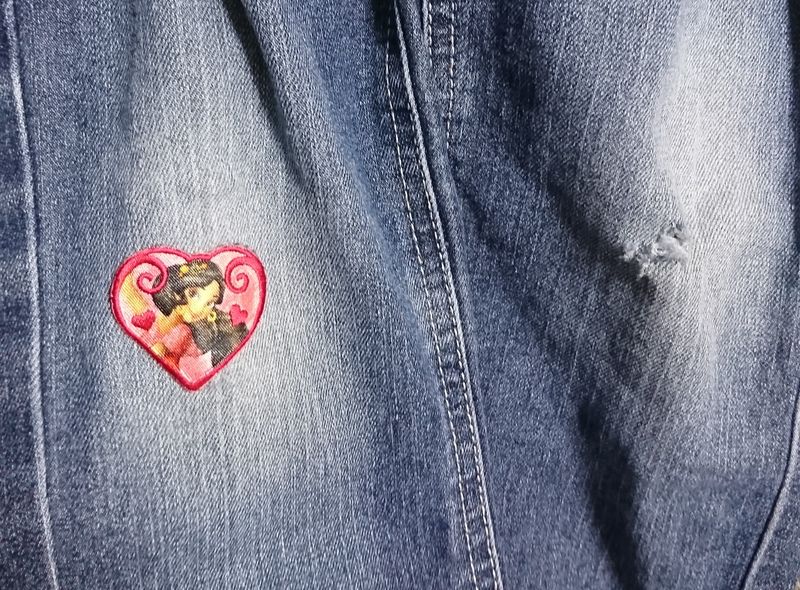
Decorative and colorful patches in a variety of shapes and sizes can be found in 100 yen shops and craft supply stores around Japan for pretty reasonable prices most of the time, and one may wonder why anyone would bother buying patches from anywhere else if one can get them for just 100 yen, but the difference in price reveals more than just the difference between a famous character motif versus a random object. In my experience, the more expensive patches tend to adhere better to the garment and stay stuck longer where the cheaper ones might slide off in the wash. Either way, please follow the directions on the package the patch came with to give your patch the best chance at successfully repairing the garment.
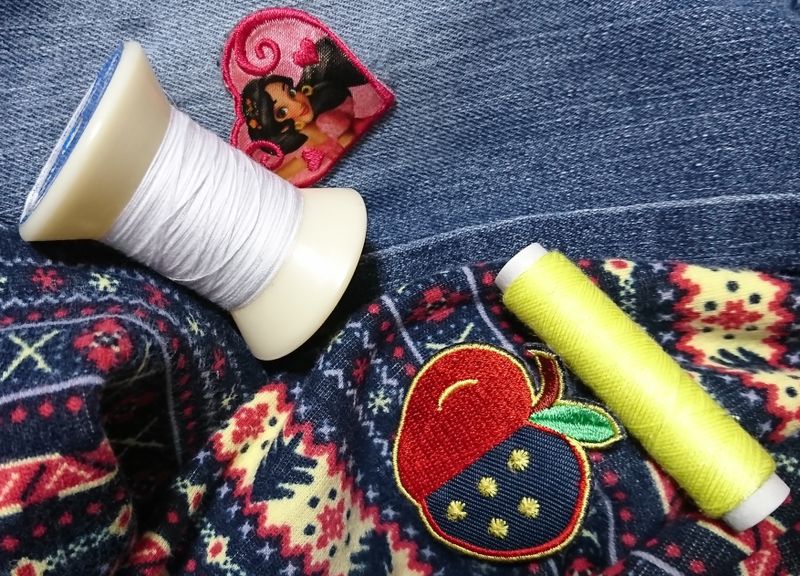
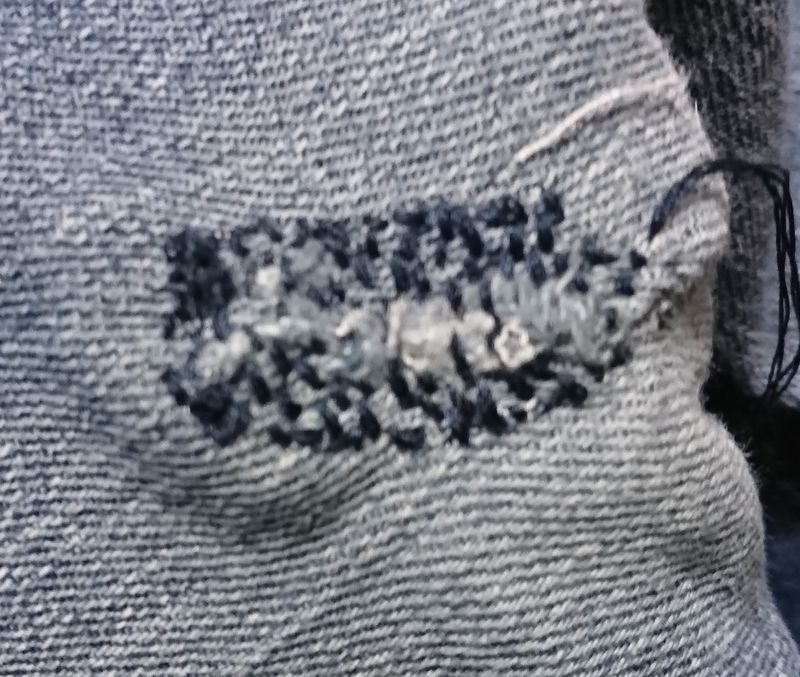
Then, if you've got a little sewing experience and a needle and thread handy, put a couple stitches into the patch and garment, just to make sure it stays in place. If you happen to have a corresponding color of thread on hand, use it. If not, white or black tend to work well, depending on the colors of the patch and garment.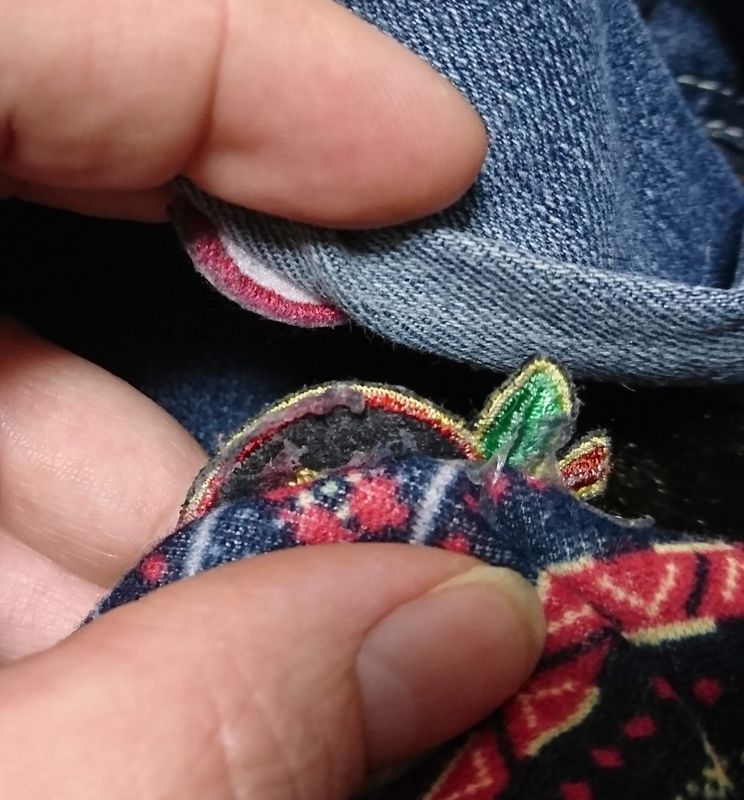 Even with the more expensive patches (here, the upper patch) come up from the fabric after a few washings. The cheaper ones (the lower patch, an apple from the 100 yen store) don't tend to adhere nearly as well and start to separate pretty quickly. Both can be fixed with just a few stitches to keep them in place.
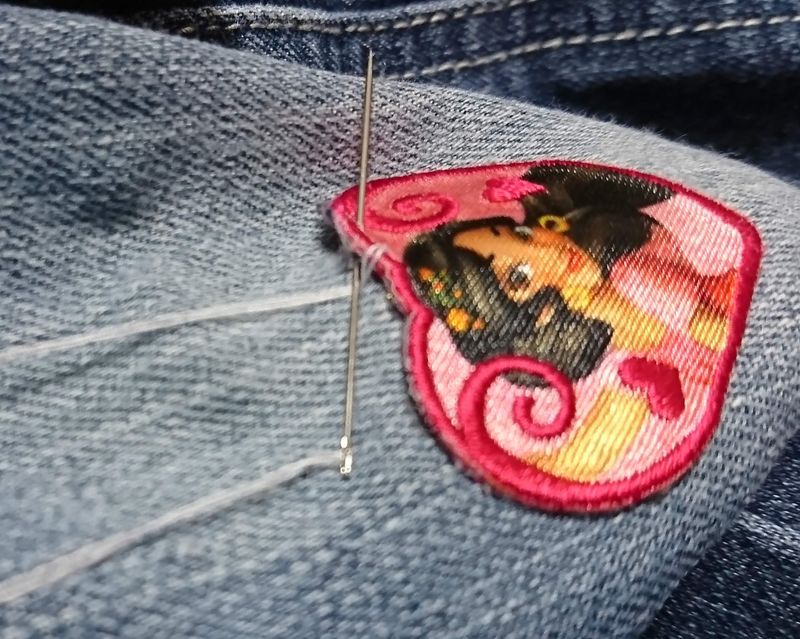
The goal here is to go around the shape of the patch, connecting through the garment, in a fairly regular pattern. It doesn't have to be too precise as these are only kid's jeans and the goal is to help them continue to be useful until she grows out of them in a few weeks, not a few years. If your thread matches well, the additional stitches will be barely noticeable.
Option B: Weave it Yourself
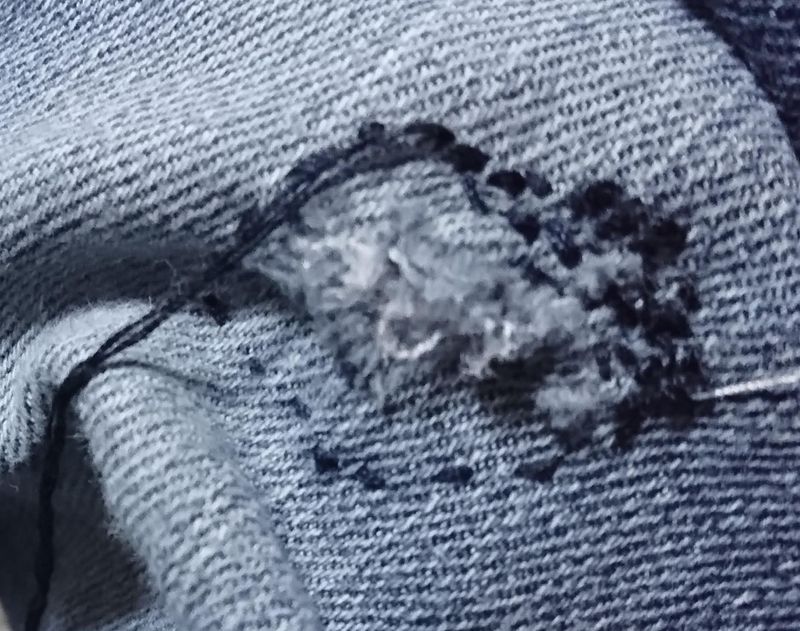
I saw this option in a few Japanese craft magazines and thought I might give it a try as the second patch that I had put on these jeans had somehow escaped in the wash. This time, I picked a dark blue thread in a thicker variety, doubled over the thread in the needle twice, and got to work. From what I have seen, you first need to stitch around the outside to stabilize the area, and then weave your needle through the damaged bit in straight lines going one way (horizontal), then the other (vertical). If you keep it perfectly flat or balanced over an apple or orange, it shouldn't pucker like mine does here. If it's really hideous, you can always just put a patch over it.


2 Comments
maynestacy
on May 15
Great! I just added patches to an old backpack to give it new life. We think the same way. I am encouraged to keep going, doing extra, by your posts! Cheers from Canadian in Yokkaichi, Mie trying to live sustainably.
JTsu
on May 16
Thanks and cheers to you for pursuing sustainability! It's not always easy but it is often more economical as well as less damaging to the environment.