Jun 29, 2020
How to Patch Squishy Foam Toy Tears in Japan
When I lived in the states, these weren't popular toys. Some time in that last decade or so, they have become popular in many countries including Japan. Adorable little colorful foam creatures hide among the stuffed animals in my daughter's room until the inevitable happens. After one too many squeezings, the thing develops a rip, sometimes along a seam, sometimes in an unexpected or unfortunate place, like this little purple kitty who was nearly decapitated with love.
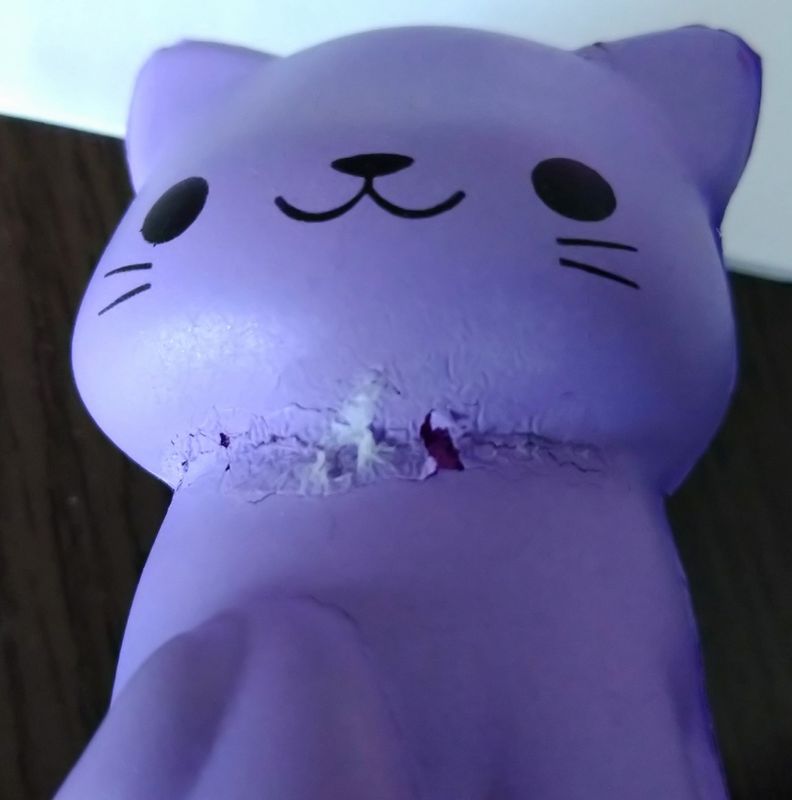
See the line under the neck? That's where the superglue hardened the whole area, leaving a little puckering and a few scratches while diminishing the overall quality of the toy.
Previous attempts I made to patch these toys ended with mixed results. I had assumed superglue from the 100 yen store could patch anything and in this case it works but not without drawbacks. The texture around the area hardens, meaning that space is safe from future cracks but is also no longer squishy. Not only does this change the amount of enjoyment my kid gets from the toy and make it look a little different, it also makes the area just outside of the superglue-affected space more likely to crack in the future when squeezed.
Many people would probably just throw these away at that point, but when they are underused gifts sent to us from family abroad, I want to make them useful again.

While the label says to use this glue on cloth, paper, and wood, it will also work well on foam toys.
Enter Farbic/Craft Glue. This time I went to the craft store instead of the 100 yen store, hoping the quality might be better. For a fair price, I went home with a large amount of this and so far it does seem to work a bit better than some of the cheaper stuff.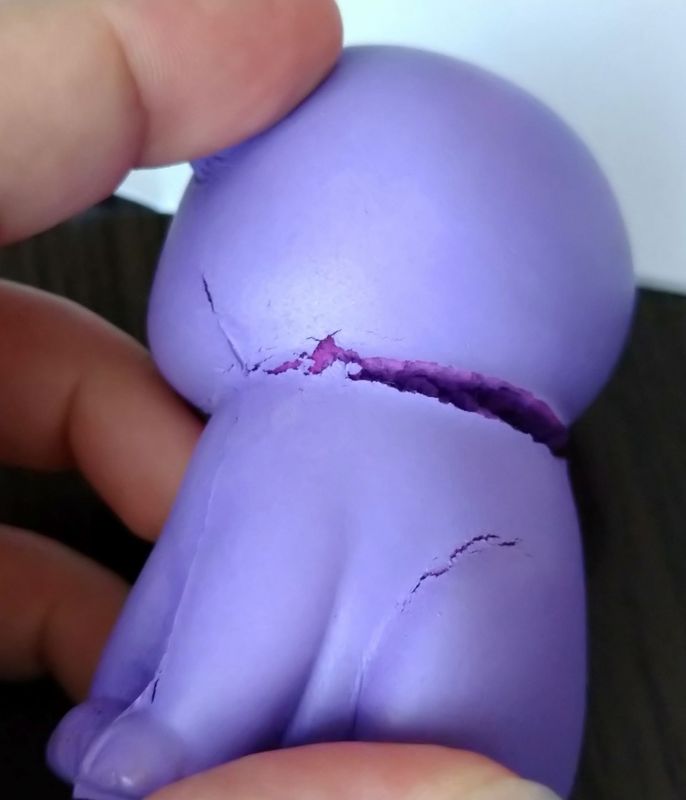

I applied it liberally to the ripped spaces, starting with the back of the neck. i then released the toy and let it settle back into its normal position, wiping away the excess glue with my finger tips, though a paper towel would also work.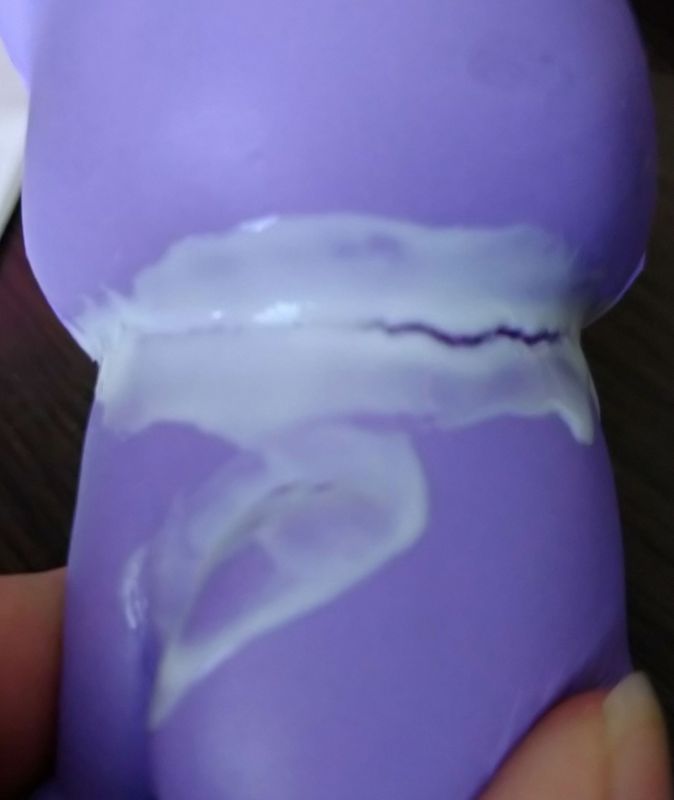
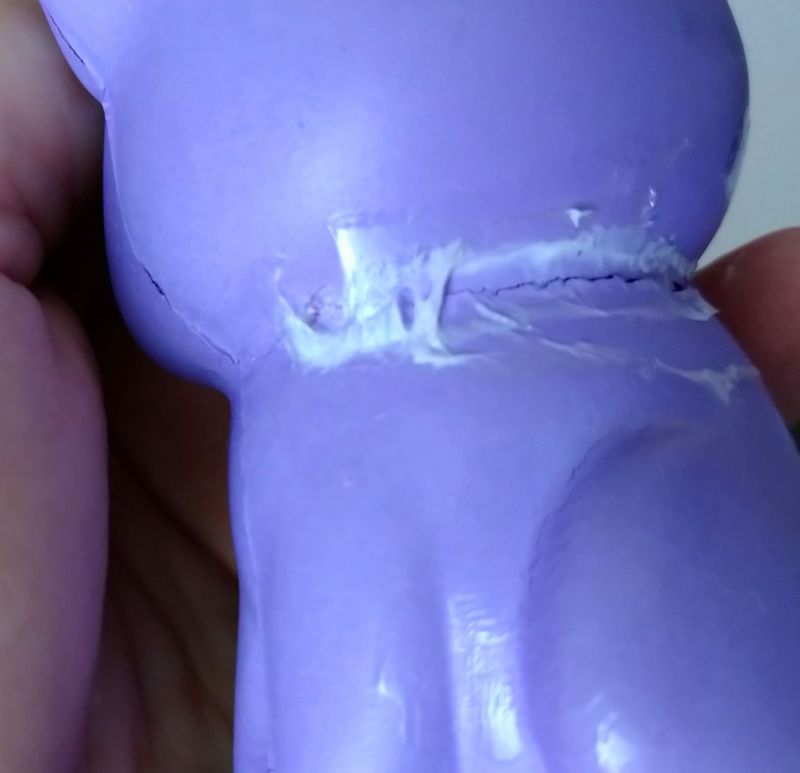
Letting it dry takes longer than the superglue drying time, but it was still less than ten minutes and in the end, the toy was a lot more functional. The only thing left to do was pick away at the little cobweb-like residue patches, easily removed with tweezers or fingernails.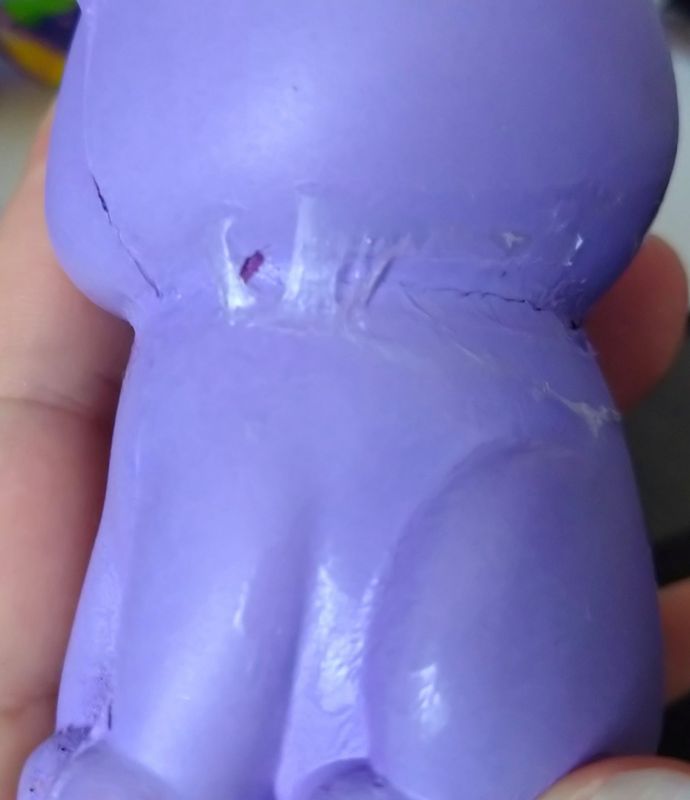
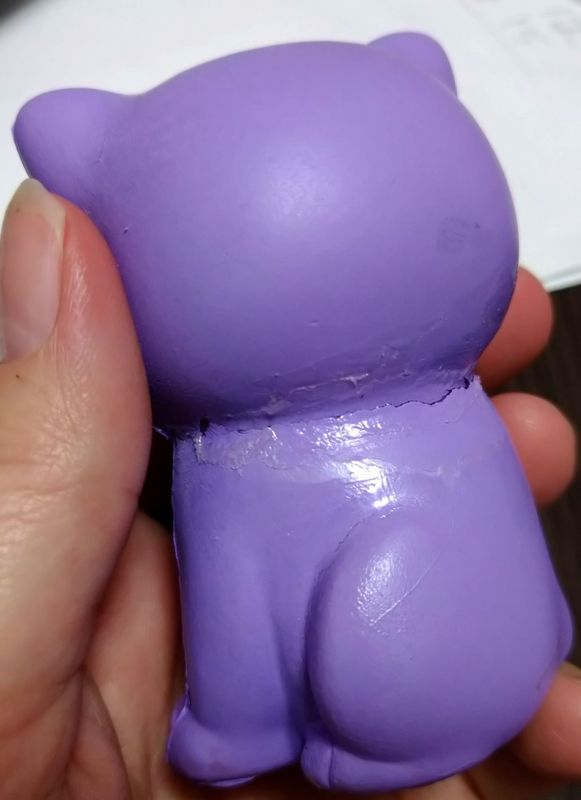
Good as new and still squishy, too!


0 Comments