Apr 1, 2021
How to improve your sakura photography
Sakura season in Japan is quite short so you don’t have a lot of opportunities to take photos. Here is some advice based on my personal experience on how to take the best photos of sakura.
1. Timing of your sakura photos
Sakura season only lasts for about 3 weeks, from the first blooming until the petals fall, so you might want to make sure you have a few days in that time frame set aside for your photography trips.
Usually, the first Sakura forecasts come out at the end of January / beginning of February. However, in the last few years, the blossoms tended to be a little early in Japan so a flexible schedule is best. This also applies in regard to the weather, which can be quite unpredictable in spring. As blue is a complementary colour to pink, in general, a blue sky is preferred for sakura photos instead of a cloudy sky.
When it comes to the time of the day, usually mornings and the golden hour are best for taking photos. Some places also do sakura light-ups which can be a really great motive for taking photos as well.
In general, weekdays are less crowded compared to weekends so they should be preferred if you want to take photos without people.
2. Places to take photos
You might want to check in advance where you would like to go for your photography. The famous sakura spots like Nakameguro, Asakusa or Yoyogi Park in Tokyo are usually very crowded so going to lesser-known places might be the better option. During the pandemic, a lot of parks are closed down or there is limited access to areas with cherry blossoms so you definitely should check associated websites in advance. Some places in Tokyo like Shinjuku Gyouen require an advance reservation at the moment.
3. Which lens to use?
Depending on what kind of picture you want to take, you will need different lenses. For taking a landscape picture with several sakura trees a wide-angle lens is best.
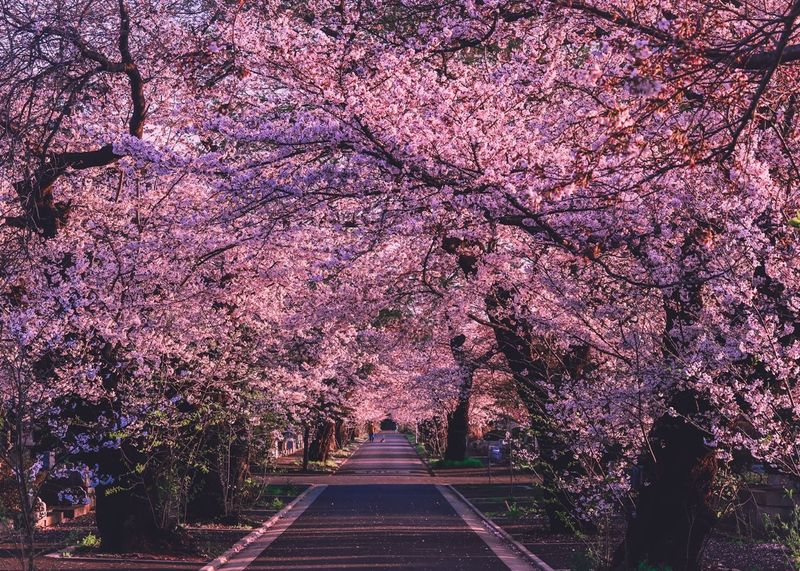
This was taken with a 24mm lens.
For taking close-ups of single blossoms a fixed focal length lens which can be set to a small f-number will give you the most "bokeh."
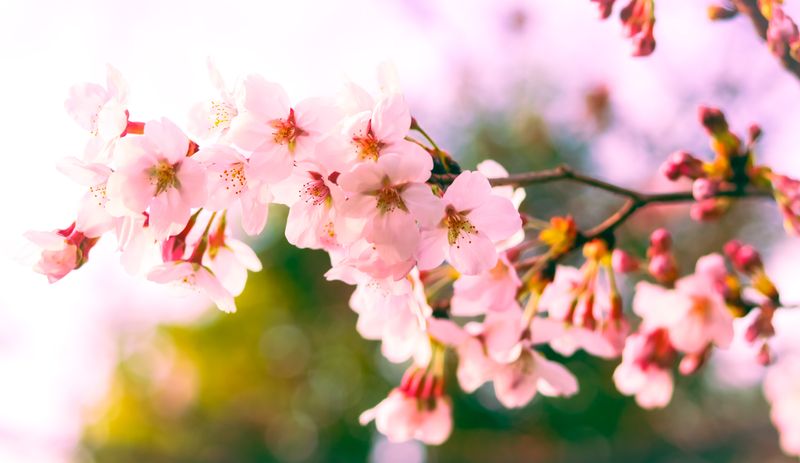
This was taken with a 50mm lens at f 1.8.
4. Using tools to spice up your pictures
This year I started to experiment with different small tools to make my pictures more interesting. For this picture, I used a small decoration object from the 100-yen store and held it in front of my lens. I created some nice light effects.
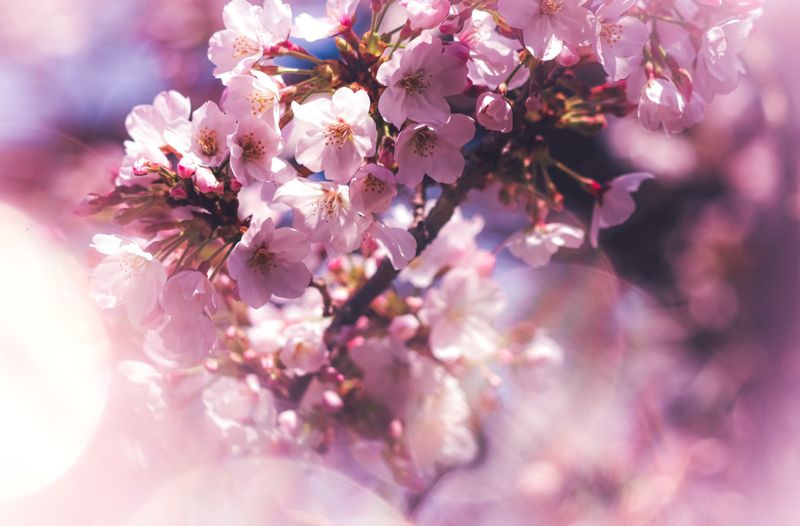
For this picture, I used a photography prism that created a nice mirror effect.
You can also use artificial sakura branches to hold in front of your camera to create front bokeh.
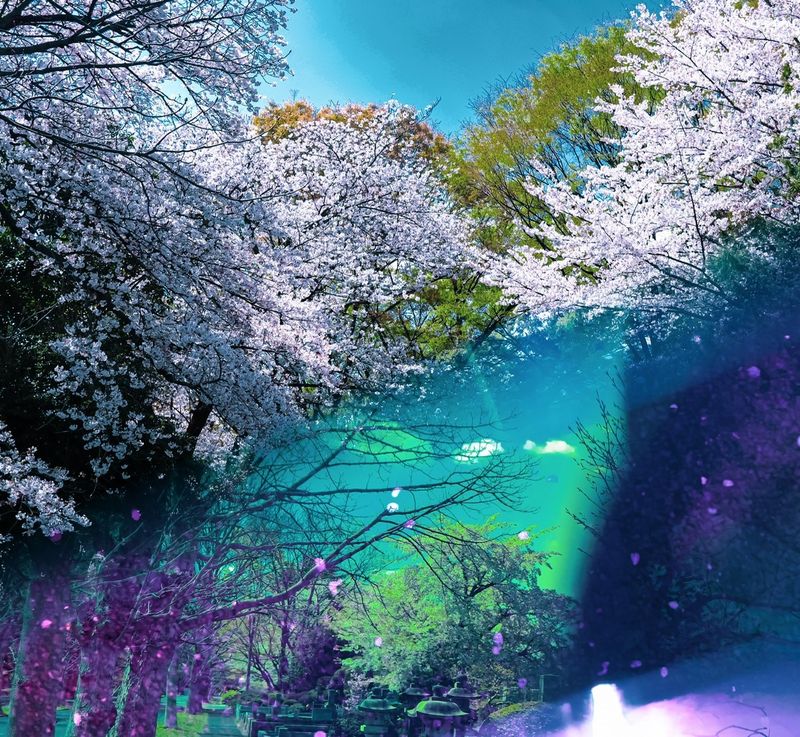
5. Editing your photos
Most sakura are rather white but it is quite easy to edit them to make them look more pink-ish in Lightroom. For a slight pink you can adjust the "temp" and "tint" of the colours slightly to the right side. For a stronger pink you can play around with the orange colour in the colour mix or change the highlights to a pink colour in the colour grading.
Have you taken any nice sakura photos this year?


0 Comments